In the Fees Collection module, you can efficiently handle the collection of student fees and keep track of fees-related information. The Fees Master is established for each session, so it's necessary to input the Fees Master data for every new session. Within this model, we gather fees, apply discounts, and review the fees paid by each student based on their payment ID.
The workflow for the fees collection module starts with configuring the Fees Type, Fees Group, Fees Master, and Fees Reminder to establish our fee structure for the current session, followed by the collection of student fees. After that, we can look up fee payments, identify outstanding fees, and review various reports, while students can also access their fee details and make payments.
We will establish the fee structure in the LMS by utilizing Fees Type (which includes different categories of fees that the school charges, such as Admission Fees, Monthly Fees, Uniform Fees, Exam Fees, Library Fees, Sports Fees, and Transport Fees). Fees Group (which helps in organizing various types of fee categories). You can then assign this fee group to either the whole class or to an individual student, and you can create a fee group for installments as well.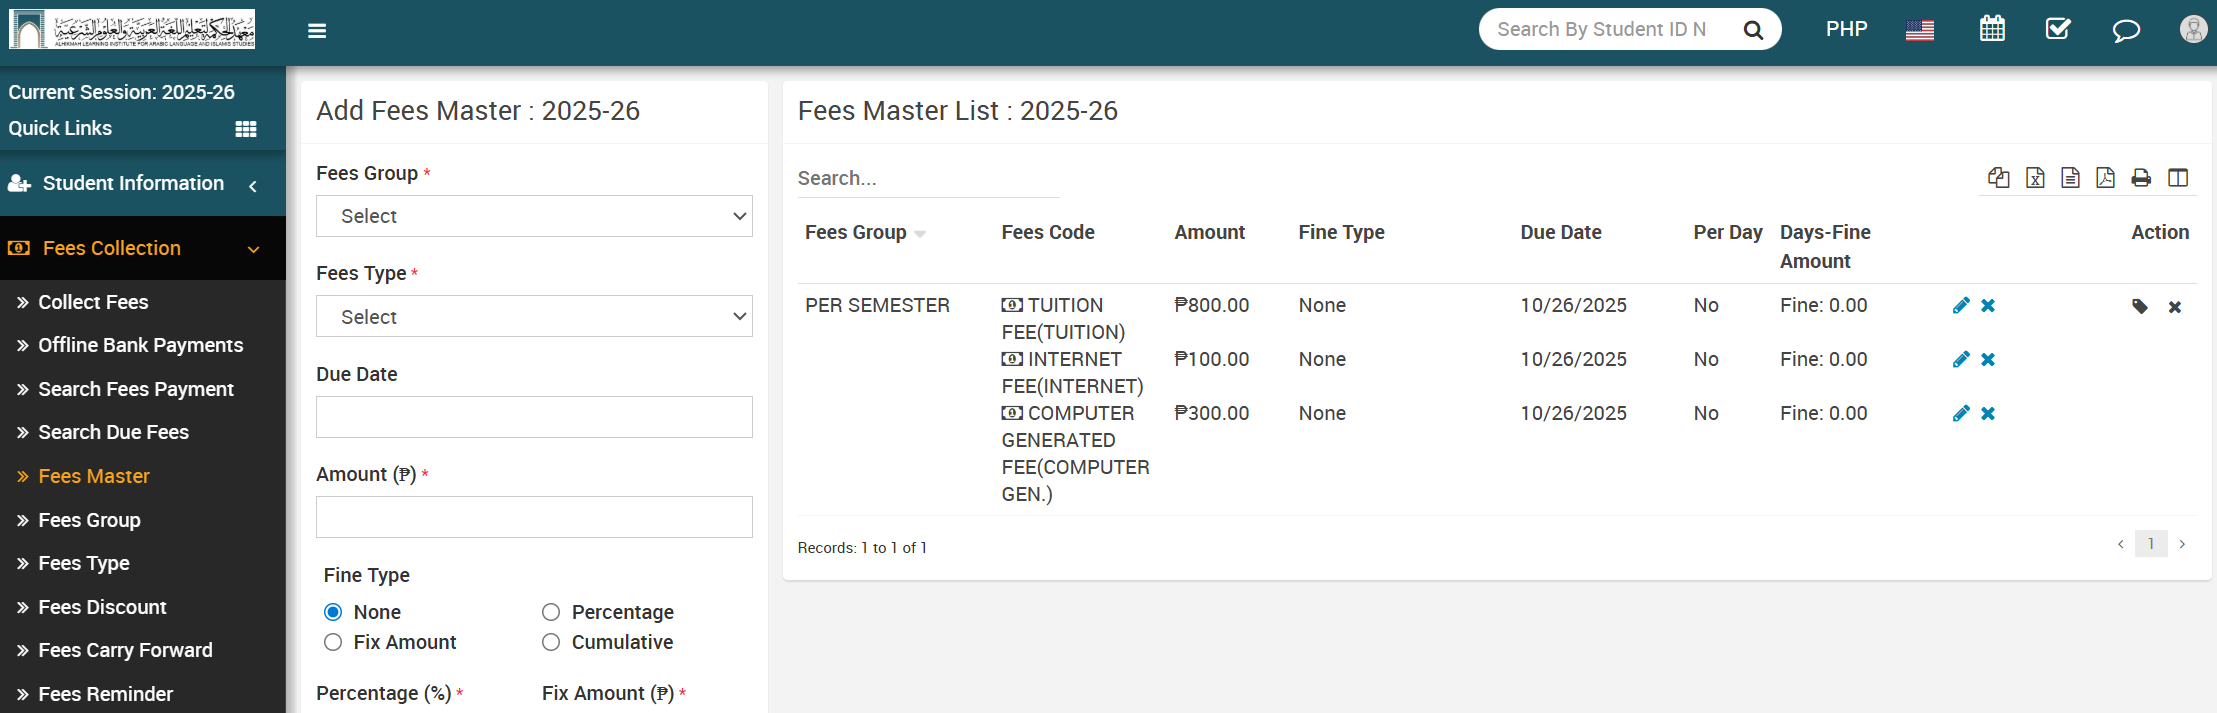
How to add Fees Type?
To add fees type, go to Fees Collection > Fees Type then enter Name, Fees Code and Description and then click on Save button. You can view this added record in the Fees Type List on right side of the page.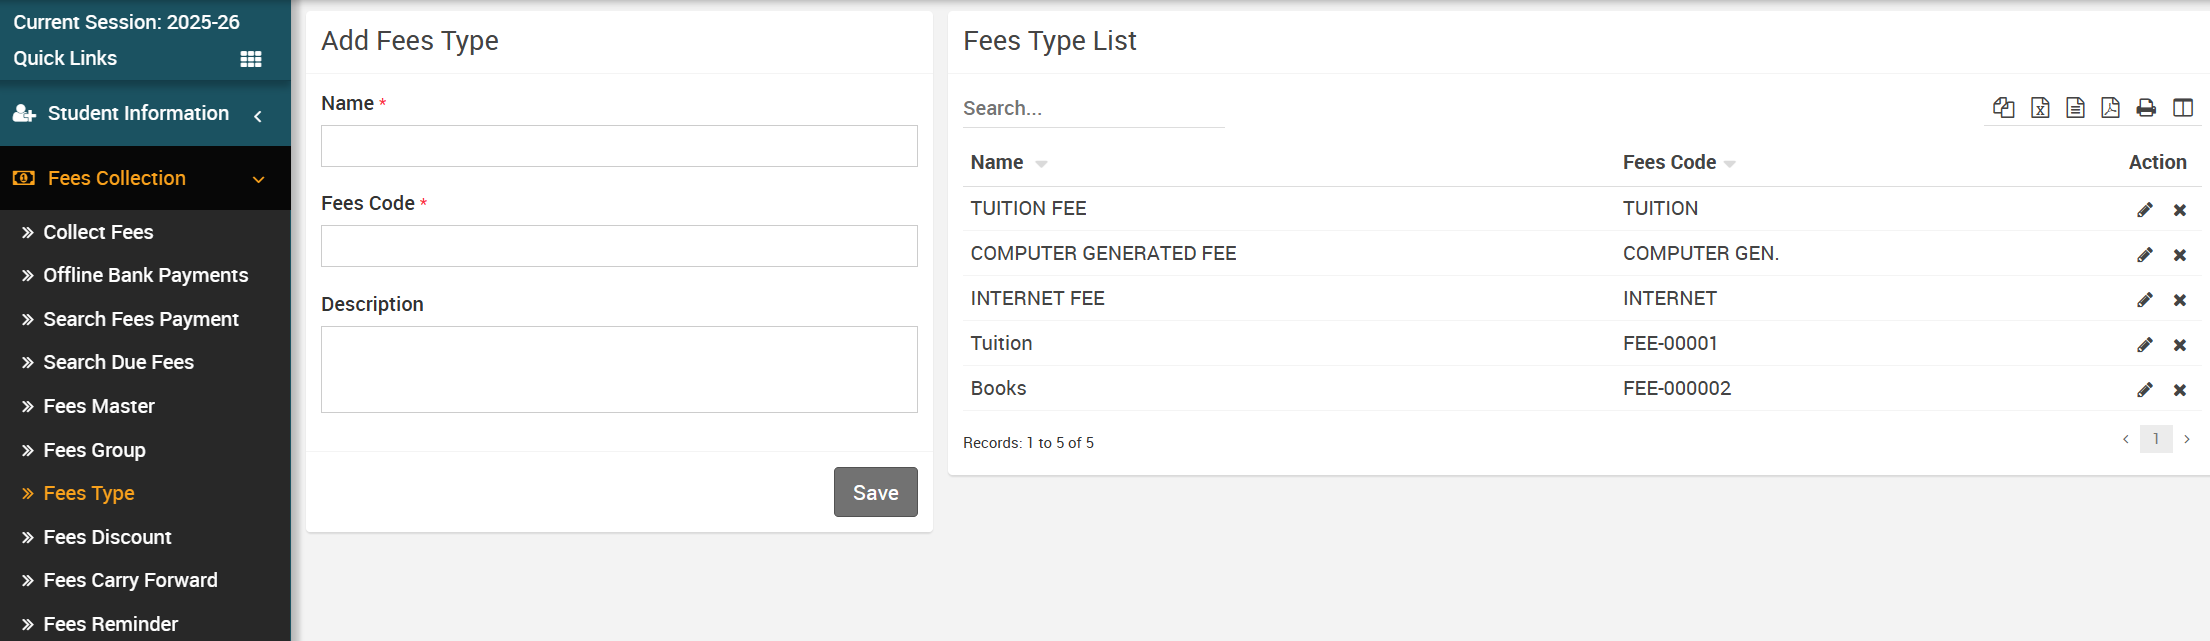
To edit fees type click on Edit icon and to delete fees type click on Delete icon present in the fees type list.
How to add Fees Group?
To create a fees group, navigate to Fees Collection > Fees Group (a fees group consists of various types; here you can establish fees such as Enrollment fees, monthly fees, admission fees, exam fees, and other fees) then input the Name and Description, and click on the Save button. You can find the newly added record in the Fees Group List located on the right side of the page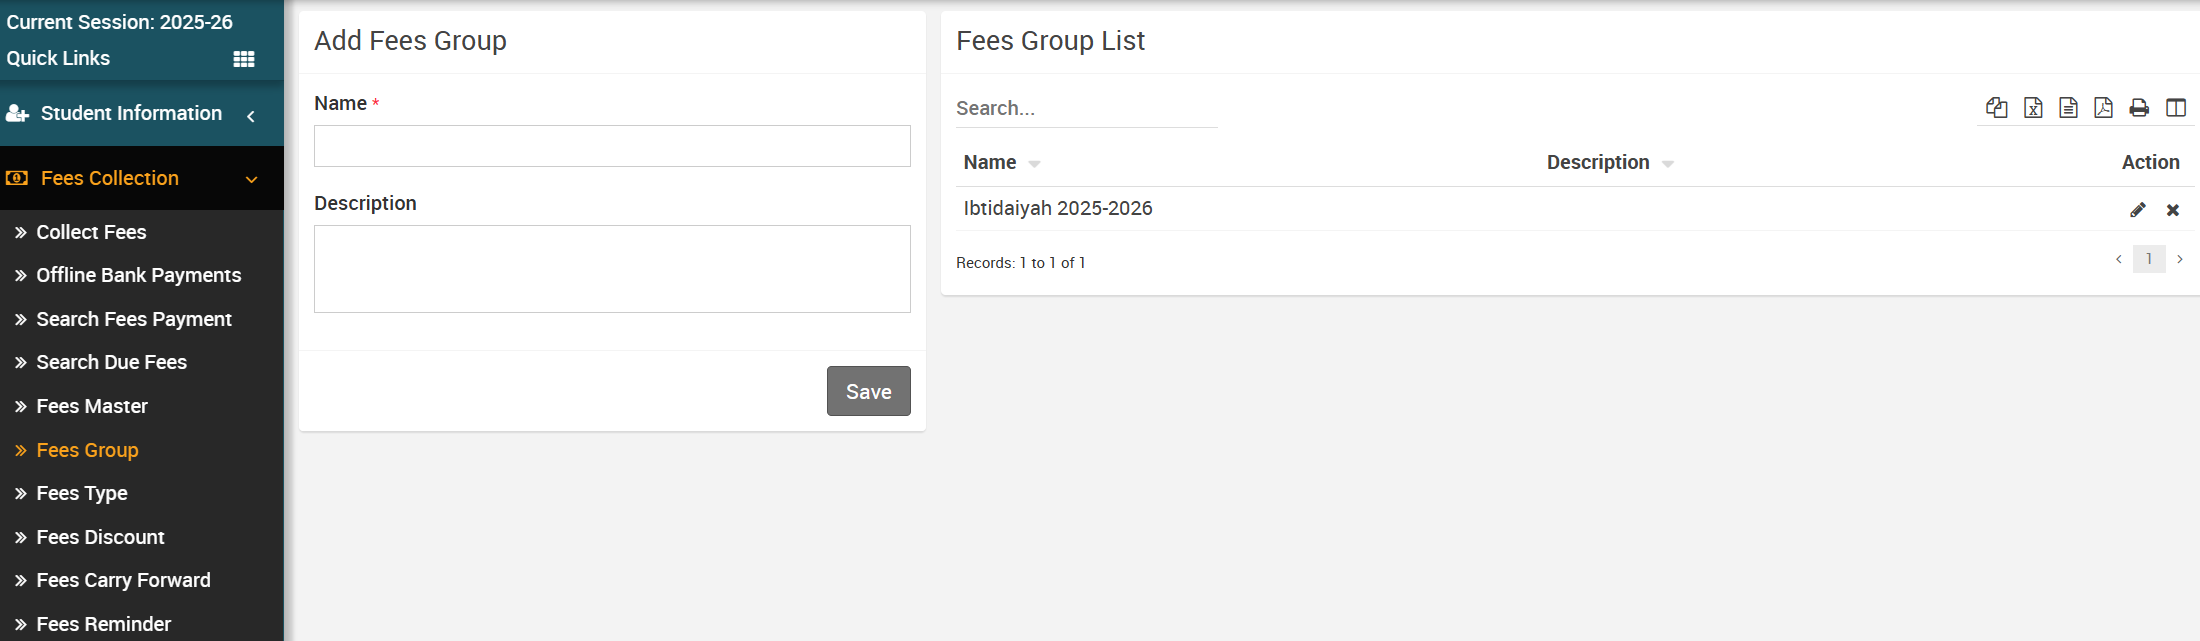 .
.
To edit fees group click on Edit icon and to delete fees group click on Delete icon present in the fees group list.
How to add Fees Master?
To add fees master, go to Fees Collection > Fees Master (In fees master, we select fees type and fees group and after that we assign students for fees group.) then select Fees Group, Fees Type and Due Date then enter Amount (fees amount for selected session), Fine Type (None, Percentage, Fixed Amount, or Cumulative). Finally, click the Save button. You can view the added record in the Fees Master list on the right side of the page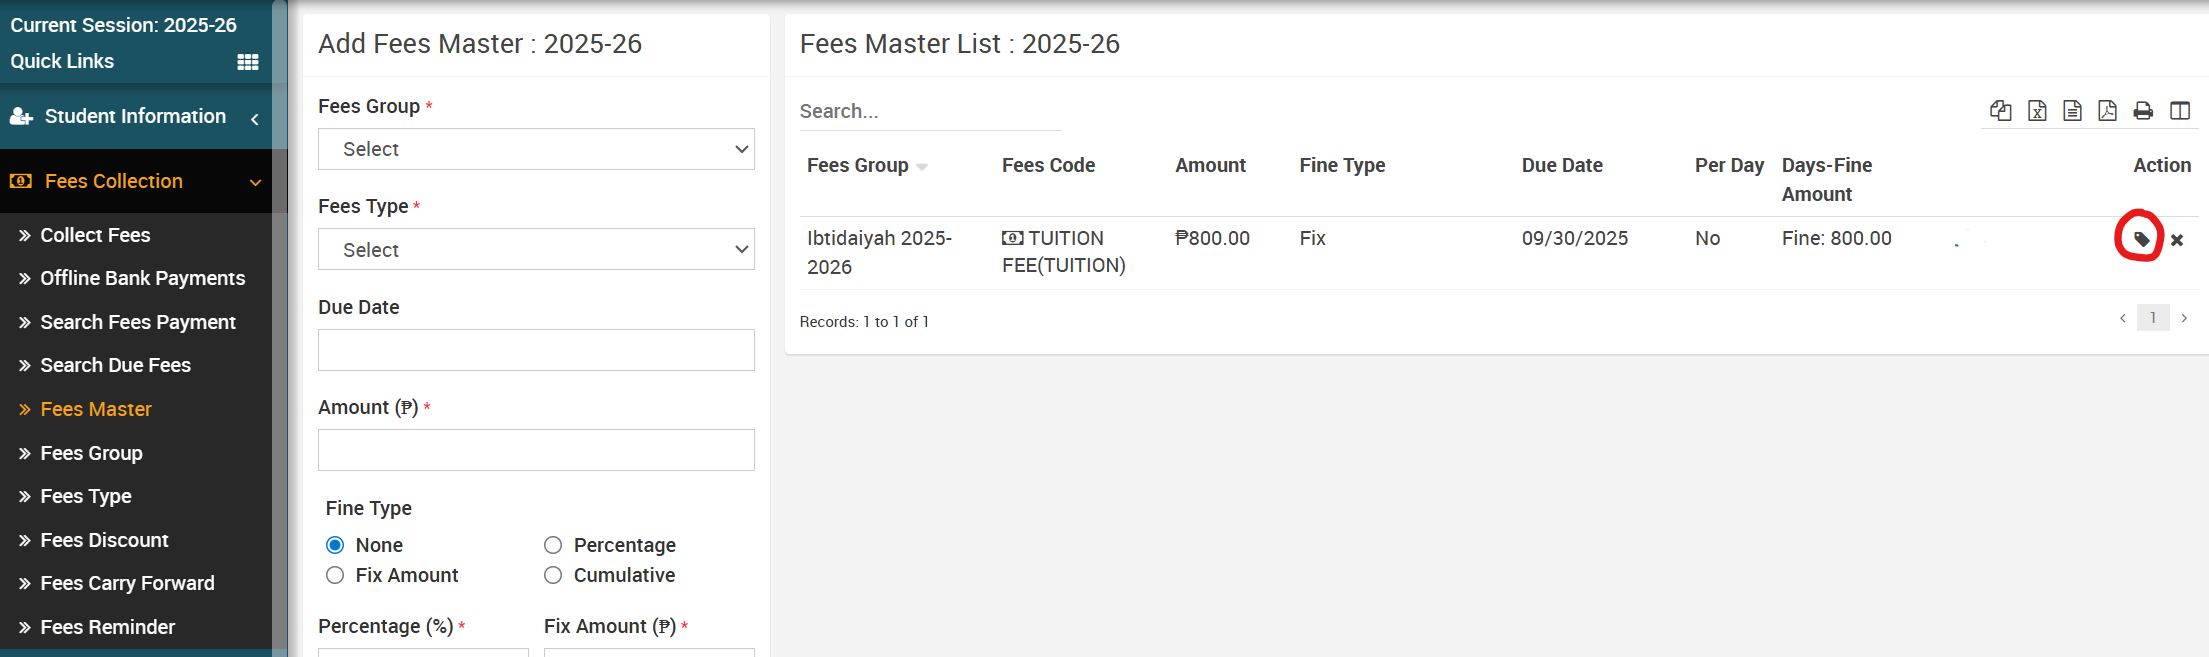
To assign/view student click on Assign/View student icon present at Action column in the fees master list, it will redirect you in the Assigned Fees Group page, here select Class and Level, Gender and then click on Search button. The list of assign fees group will be shown in the below of the page. Now select student to whom you want to assign fees group and then click on Save button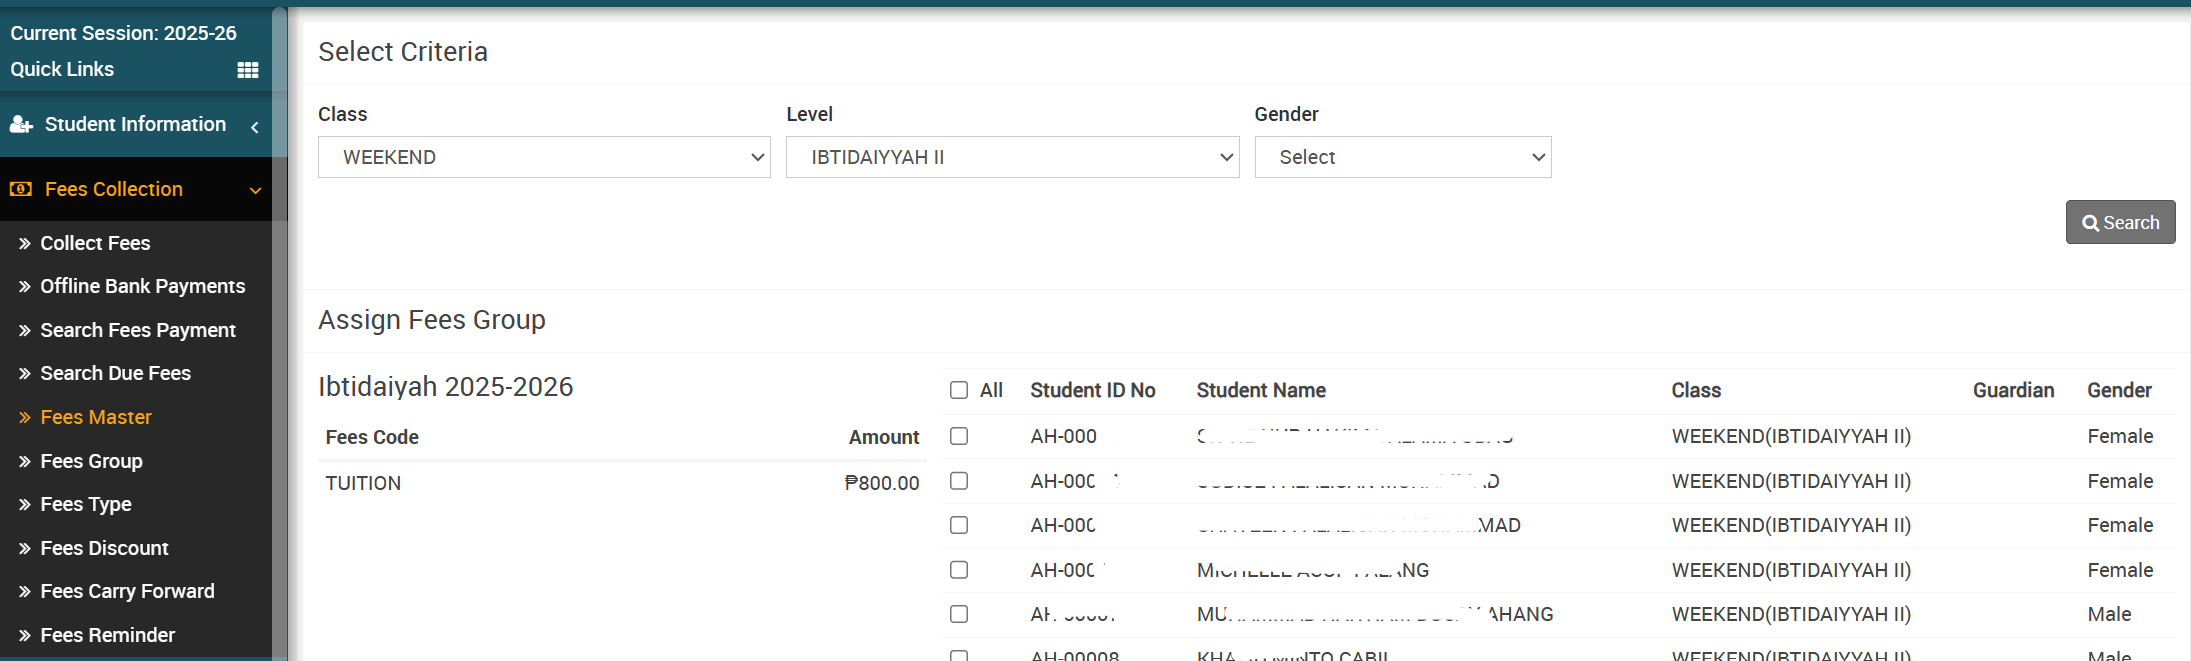 .
.
To delete fees master click on Delete icon present at Action column in the fees master list.
About Examination
Exams are the way to test our knowledge. Exams are necessary in schools and colleges to find out the real skills, talents and knowledge of the students. This module is used to maintain entire subjects examination records including exam grade, exam group etc.
How to add subject in Exam?
To add exam subjects of each Level, go to Examination > Exam Group then click on Add icon present at Action column in exam group list, at click of this icon Exam List page will be open.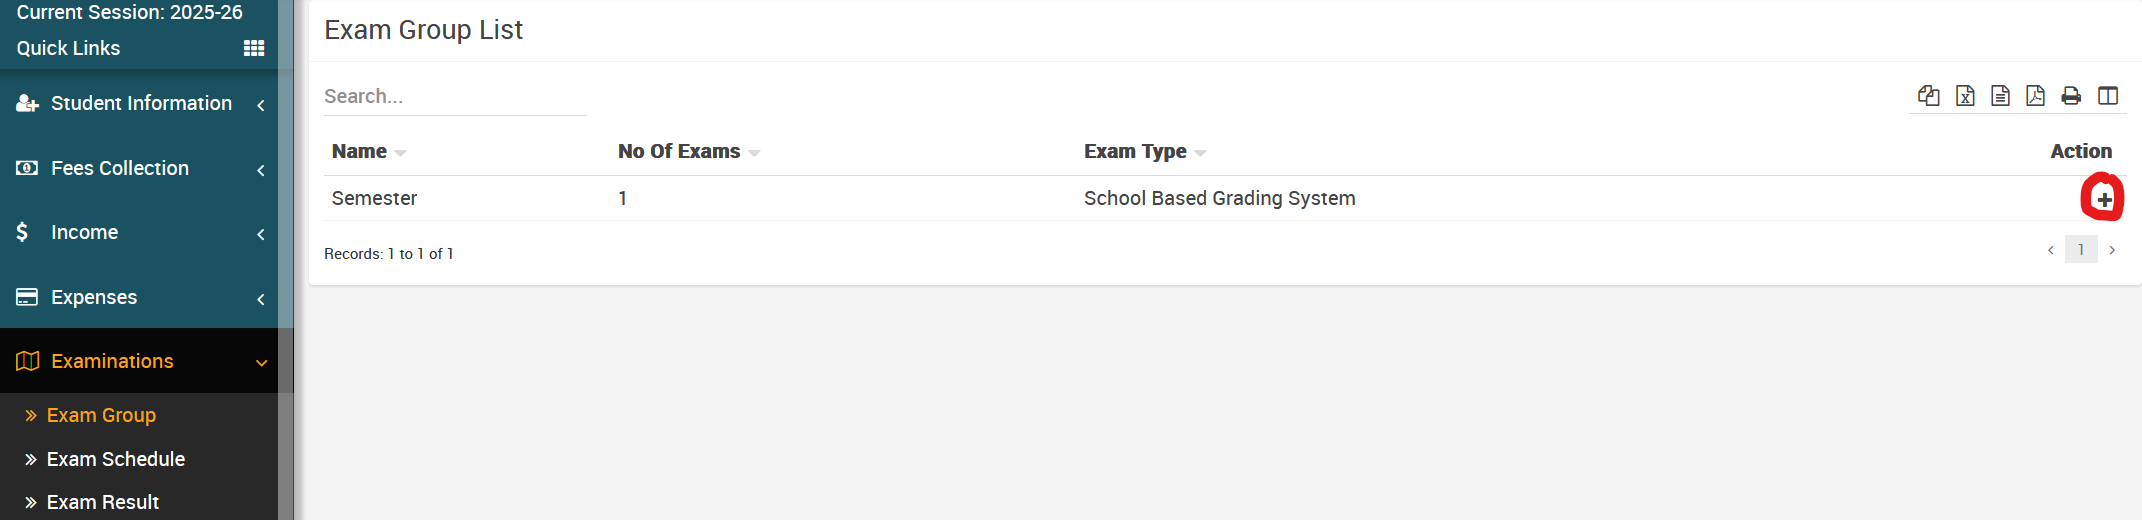
To add exam click on Add (+) icon present at Action column in the exam group list, at click of this icon Exam list page will be open.
Now click on the Exam Subject icon present at Action column in the exam list page, at click of this icon Add Subjects modal will be open.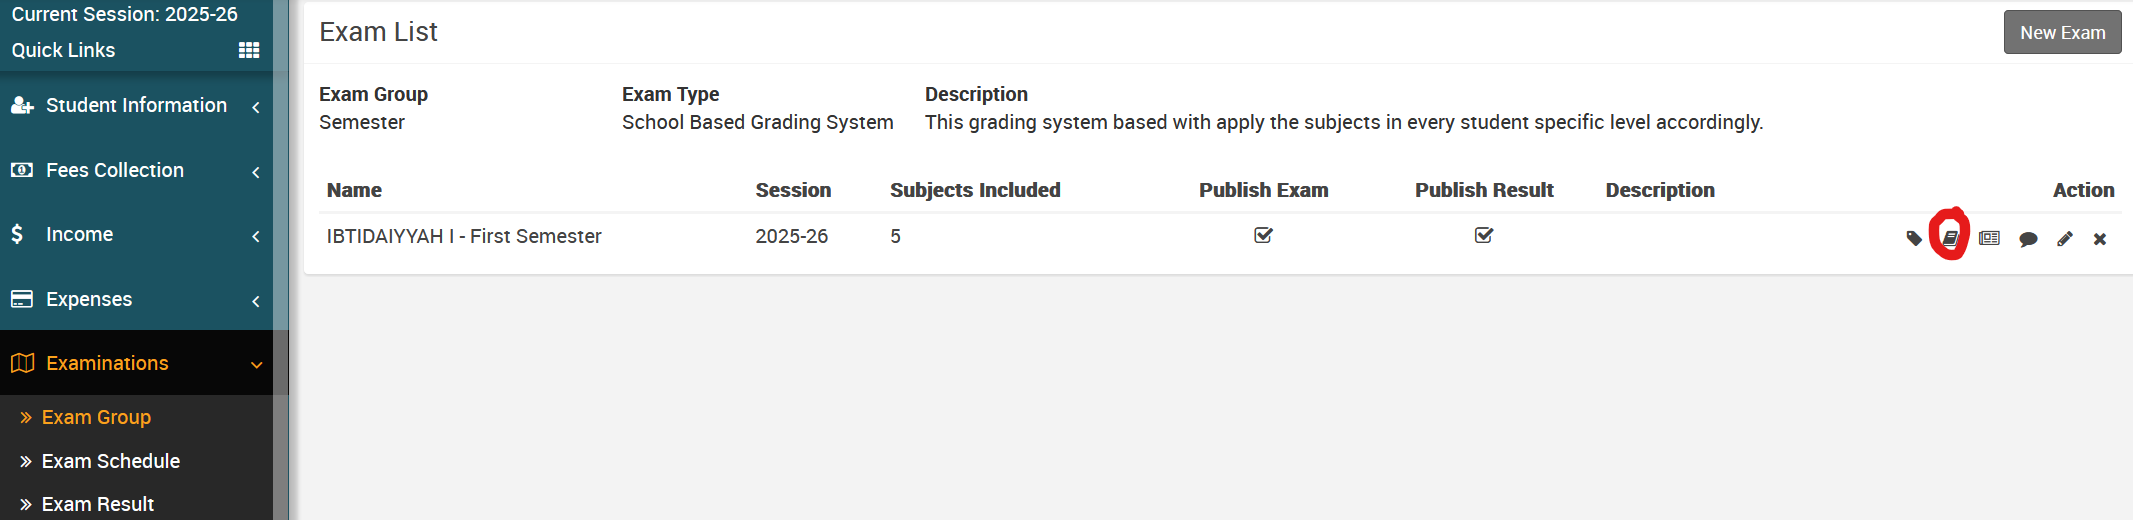
Here click on the Add Exam Subject button present in the right side of the add subject page, at click of this button new column box will be added then fill the details Subject, Date, Time, Duration, Credit Hours (If you are using GPA grading system exam type, then enter the credit hour otherwise ignore it.), Room No., Marks (Max) and marks (Min.) and then click on Save button. If you want delete any subject then click on Remove icon.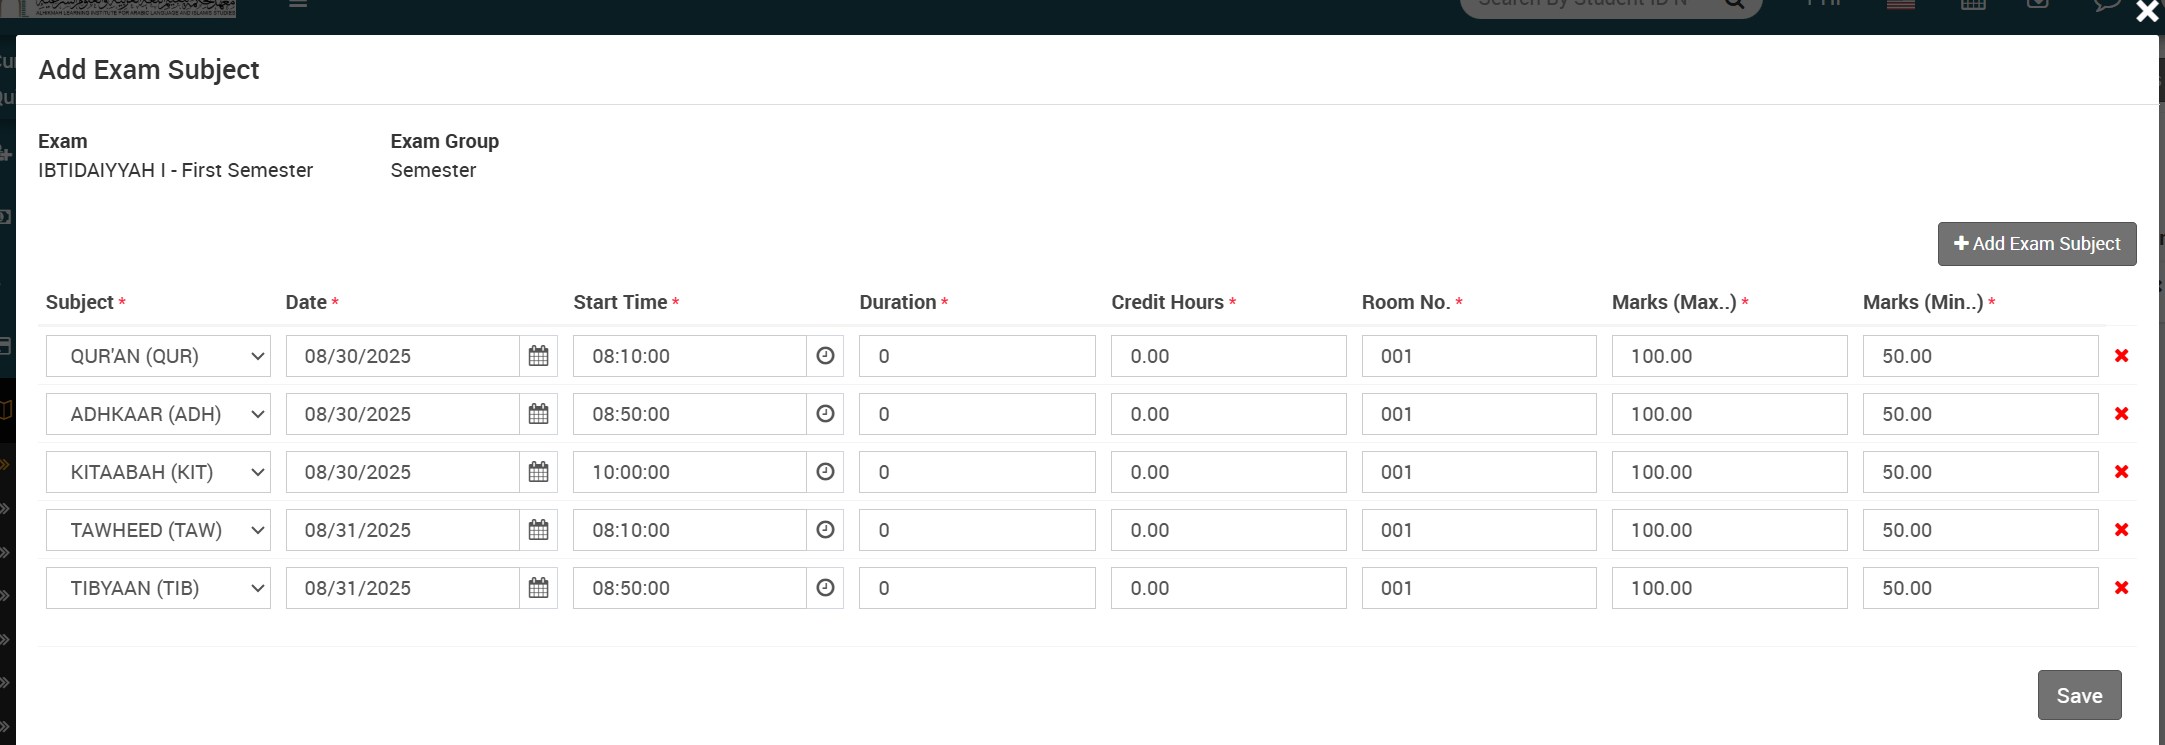
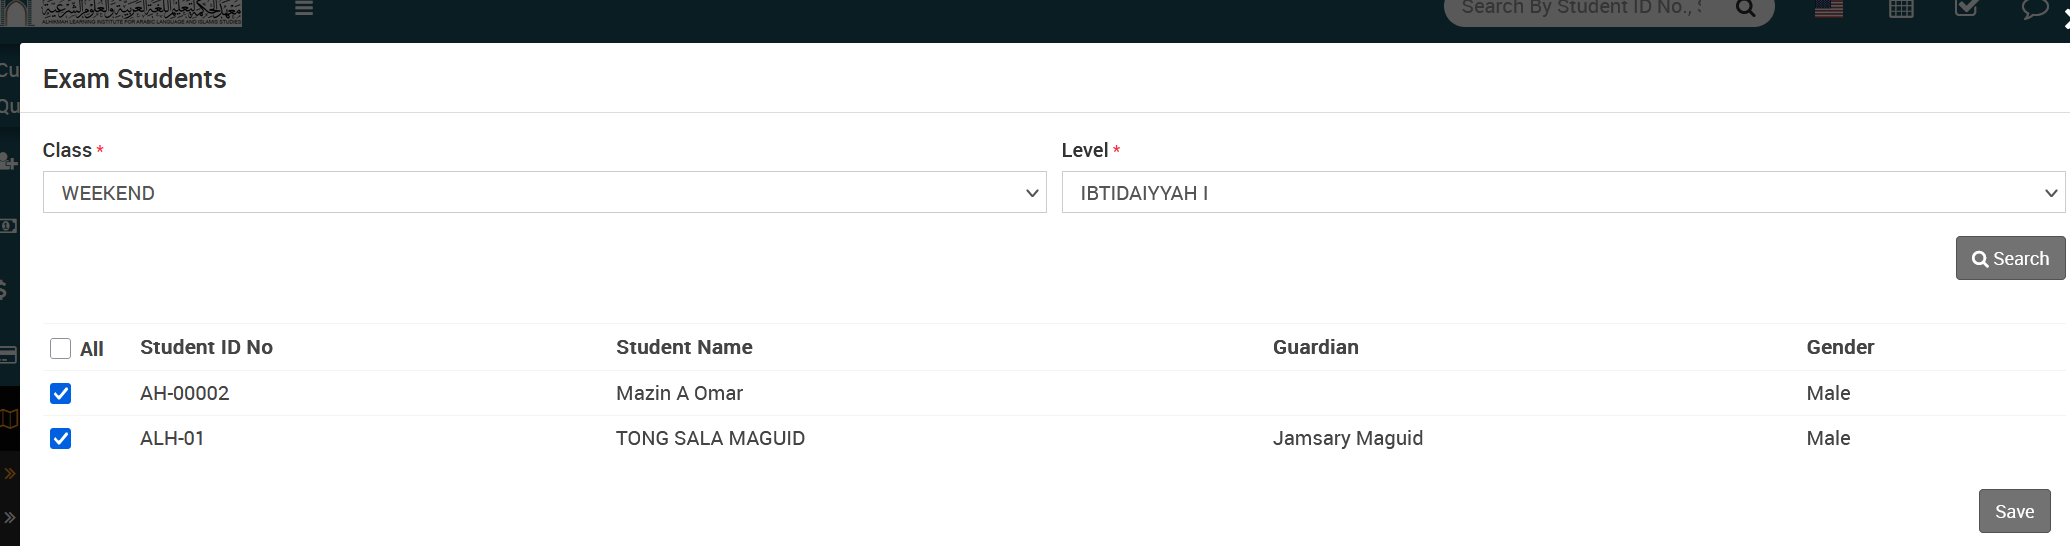
How to assign/view student for exam?
To assign/view student, go to Examination > Exam Group then click on Add icon present at Action column in exam group lists of subject, at click of this icon Exam List page will be open.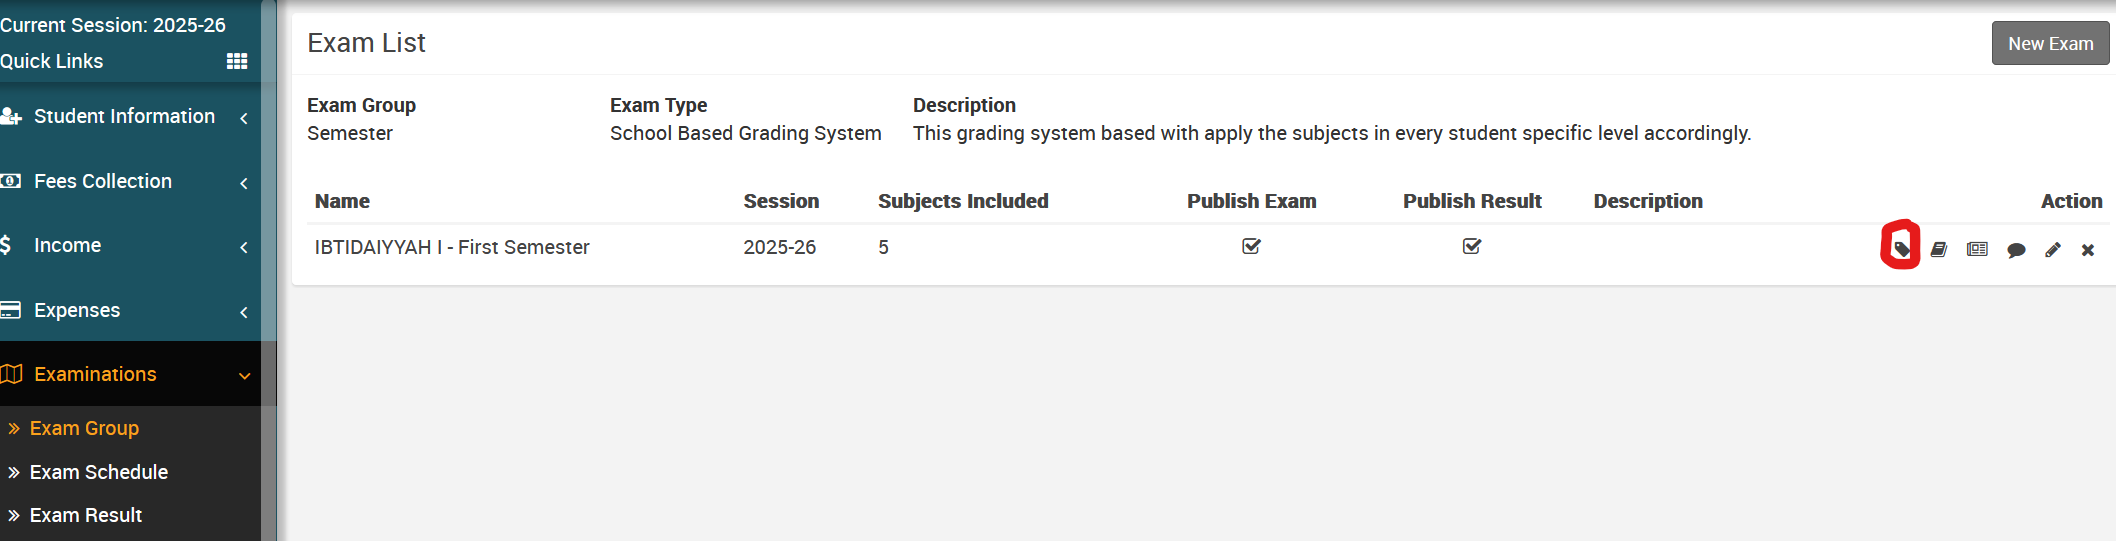
Here select the Class and Section and then click on the Search button. Here you can see all assigned or unassigned student for the exam. Now select student you want to Assign and Unassign for exam and then click on the Save button.
Remember: The Subjects Shown on your profile if the test/exam has results